3 Favorite Lightroom Tools & Shortcuts
Whether you are self-taught or have taken a formal class on Lightroom, there are oodles of tricks and shortcuts to discover. I’ve been using Lightroom for years and am still finding new ways to make the editing process better. Without further ado…here are 3 of my favorite Lightroom tools and shortcuts!
The following are all in reference to Lightroom Classic.
1. Number shortcut keys for culling
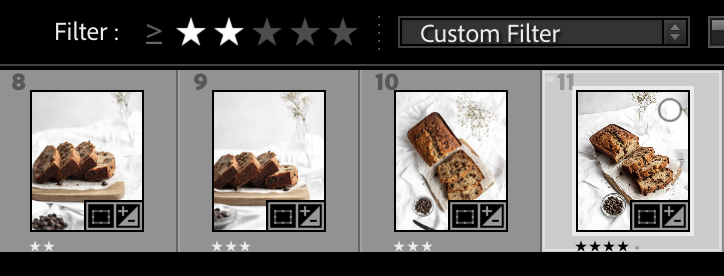
Culling is the process of deciding which photos are keepers and which are tossers. When I’m deciding which photos to keep, I use the 1, 2, 3, 4, 5 buttons on my keyboard to rate my photos as I go. I start with labeling all of my maybe photos a 1 star. Then I go through those and eliminate more, marking the winners 2 stars and so on. Using these shortcut keys makes the process of culling photos by wayyyy faster.
2. Reference Photo Function

I’ve had many a times when I’m looking at a photo in Lightroom and can’t figure out why the edit doesn’t look cohesive with my other photos. Welllllll, there’s a tool on Lightroom dedicated to help fix this kerfuffle!
The first step is to import your reference photo into Lightroom (if it’s not imported already). Go to the develop tab, click on the photo you’re editing, and select the “R|A” button right above the photo strip on the bottom. This will let you drag a separate photo into the reference section and be able to edit your photo right alongside it. Makes it much easier to see what needs to be changed.
3. [ ] Shortcut Key

The [ and ] keys on your keyboard changes the size of your brush and spot removal tool to be smaller or bigger. This shortcut is very handy and is something I use every time I edit!
BONUS: \ Shortcut Key
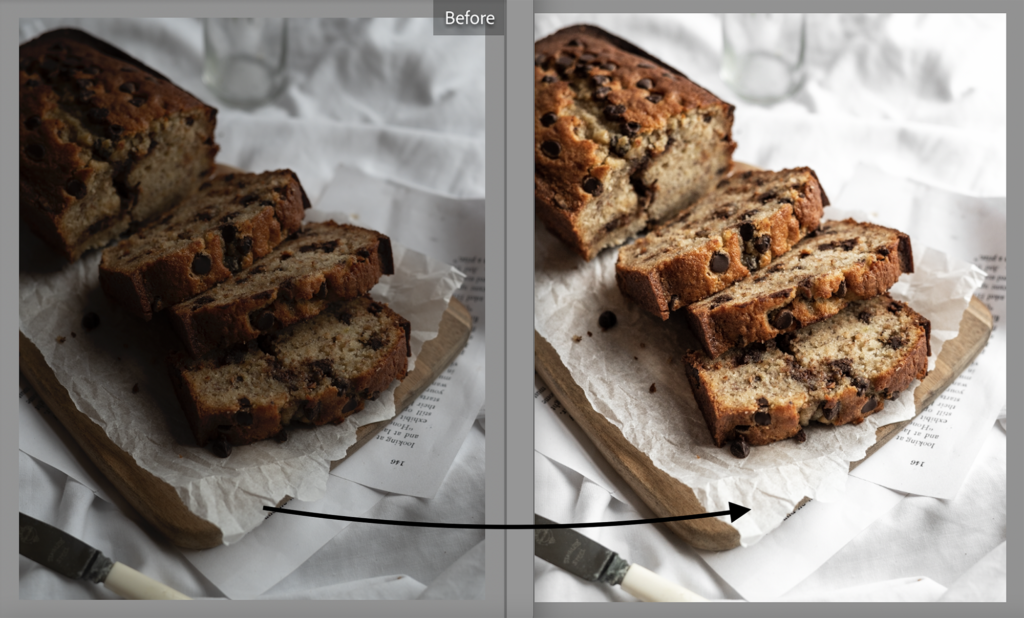
I loveeee this shortcut. When you press the \ key on your keyboard while in the develop panel, it shows you the original photo pre-edit. It’s a great way to see a before and after!
This concludes my list of some favorite Lightroom tools and shortcuts! I hope it gave you something new to try! Happy editing!


